"The agent experience is the heart of Dynamics 365 Customer Service. The key to improving satisfaction in service delivery is enabling agents to take customer requests from any channel, handle multiple sessions at a time, interact with multiple apps without losing context, and enhance their workflow with productivity tools."
Credit: Dynamics 365 Customer service Overview

Credit Picture: Power Virtual Agent
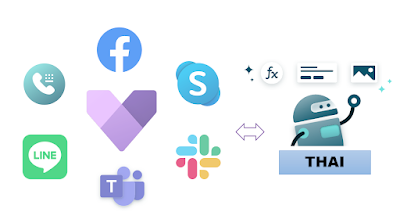
For Dynamics 365 Customer service Enterprises version has the capability to Integrate Omni Channel for more communication funnel with customer Voice Channel, live Chat Channel, Digital Messaging (Social Media)
Try Free: Dynamics 365 Customer Service Trial


3. Apply the Widget to the Web Portal

Navigate to portal management and Look for Content Snippets >> Footer Page


4. Create Virtual Agent (Thai Language)

As you can see the Thai Language is available for preview

The sample Topic is auto-generated so you make a new topic and modify the current one.


5.2 Agent Transfer configure
Setup Agent Transfer to Dynamics 365 Customer Service.

This process will automatically create an Agent user in D365 Customer Service. You may need to map Queue to Virtual Agent user (Default Messaging Quere)

Add Bot to Workstreams (Optional) All incoming work will be routed to the bot first.
 Testing Live Chat The Bot has replied to the conversion in the Thai Language

When a Customer needs to talk with a human Agent it's can transfer to Dynamics 365 Customer Service

Thanks for visiting. Next Article I will try to configure Other social media Channels connect to Dynamics 365 Customer Service
In this article, we going to config Live Chat and bring Chat bot Agent to this channel for first-tier Customer Support
Step 1 Install the Omni Channel application
Check the Customer Service environment in the Power Platform Admin center to make sure the Omni channel was installed
The installation process will take around 30 Min.
Step 2 Configure Live Chat Channel
form Dynamics 365 Application Open the Customer Service Admin page
2.1 Create New Workstreams
A workstream is a collection of settings, including channel setup, routing rules, work distribution, and bots.
for this example, I create Workstream using exist queue (Default Message Queue)
2.2 Create Chat Channel
Once set up Chat channel is the complete system that will generate a Widget source for Live Chat
3. Apply the Widget to the Web Portal
You can put a Live chat widget to your existing web Portal for me I will use Power Pages from the Power platform to test the Live Chat
I have created Blank Page for the mockup company website
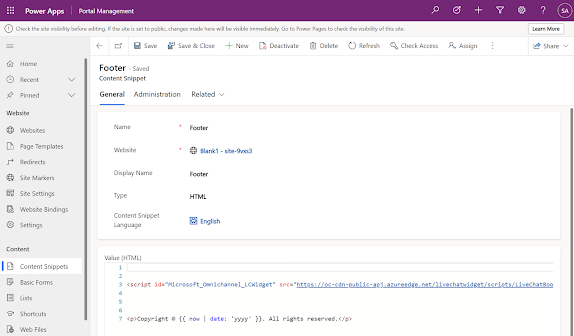
Navigate to portal management and Look for Content Snippets >> Footer Page
Put the Widget Script to HTML Value
Without Bot. The request from the Customer will be a direct transfer to the Agent
4. Create Virtual Agent (Thai Language)
Chat Bot are simulates human conversation or Power Virtual agents from Microsoft Power Platform
As you can see the Thai Language is available for preview
The sample Topic is auto-generated so you make a new topic and modify the current one.
You can be testing Bot under Power Virtual Agents and Demo website but it's will not link to Dynamics 365 Customer Service
5. Bring up Virtual Agent to the Live Chat
5.1 Publish Bot after you Create new /Modify Topics don't forget to Publish content
5.2 Agent Transfer configure
Setup Agent Transfer to Dynamics 365 Customer Service.
This process will automatically create an Agent user in D365 Customer Service. You may need to map Queue to Virtual Agent user (Default Messaging Quere)
Add Bot to Workstreams (Optional) All incoming work will be routed to the bot first.
When a Customer needs to talk with a human Agent it's can transfer to Dynamics 365 Customer Service
Thanks for visiting. Next Article I will try to configure Other social media Channels connect to Dynamics 365 Customer Service